And the garage smells like 2 stroke exhaust.
- Posted using BlogPress from my iPhone
Friday, June 17, 2011
Sunday, June 5, 2011
More progress made....
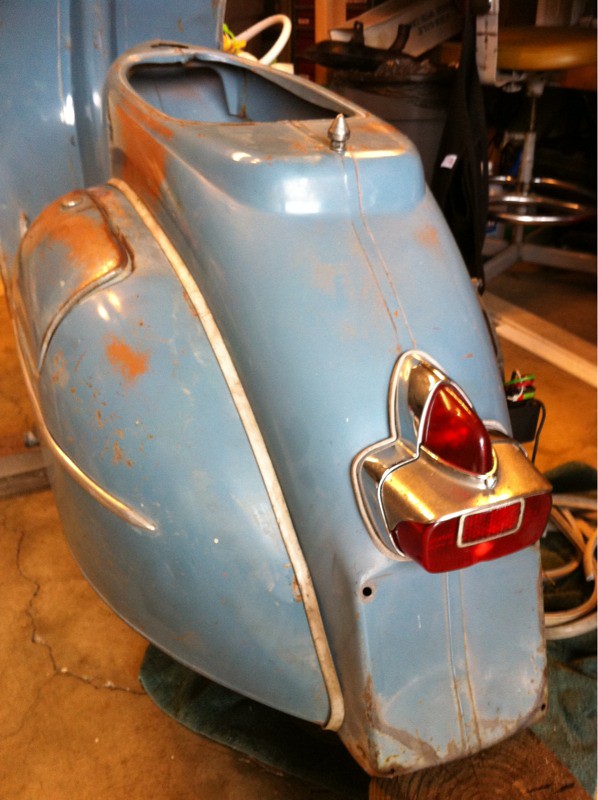
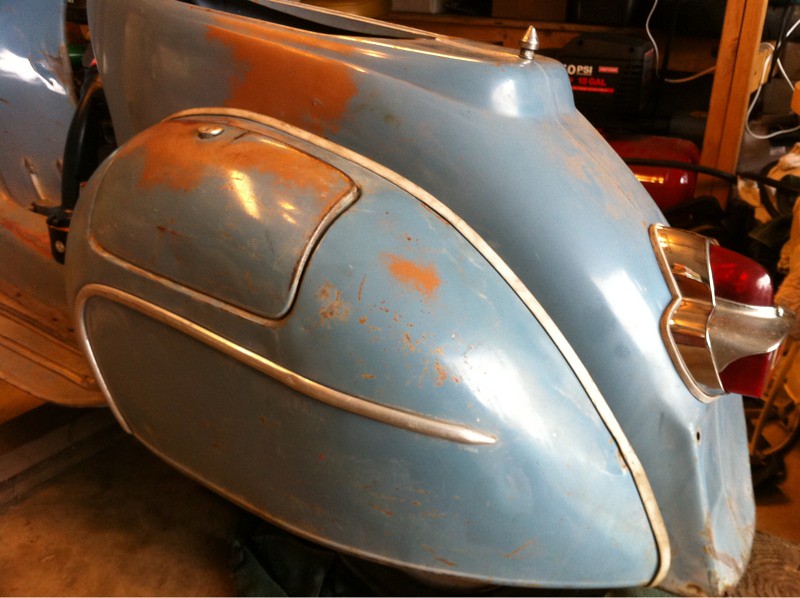
Today was about details. I got the glove box and tail light installed. Trips to Home Depot and JJ's were required. JJ's for the cowl rubber and Home Depot for the nuts and washers. I wish there was an Ace Hardware closer since they have a better selection of stainless steel stuff than the orange box. Here are pics:
I also picked up a bottle of Ospho to take care of the rust in my gas tank. I hear this stuff is the bomb. I was able to find it at an Ace near my buddy Chris's house. If the Ospho takes care of the rust like I hope it does I'll be firing this thing up soon.
Snoogins!
- Posted using BlogPress from my iPhone
Monday, March 14, 2011
VBB update
No pictures to post this time, just an update on my progress towards getting this thing on the road.
A lot of time has been spent in the garage and shop preparing and cleaning the parts that I have and doing some mock assembly of the miscellaneous bits that I have on hand. Here's a bit of a list:
A lot of time has been spent in the garage and shop preparing and cleaning the parts that I have and doing some mock assembly of the miscellaneous bits that I have on hand. Here's a bit of a list:
- Del'Orto SI 24/24E carburetor is mostly assembled and ready for installation. I just need to run some carb cleaner through it to make sure no dirt is lurking in the interior.
- I got the air box that houses the carburetor cleaned last night. Whoah! It was super dirty, but it was no match for the solvent I used on it.
- All the cabling is installed in the frame. Shifting, clutch, throttle, rear brake cables all run and ready to go. I even have a new electrical wiring loom installed.
I had always intended to convert this scooter over to 10" wheels from the default 8" wheels, but after getting it on the road and enjoying it for a while. That has all changed. JJ had a 10" Sprint fork in his pile o' parts and he was generous enough to part with it. So, now I have stripped the 8" fork of all the useful parts and have started prepping the 10" fork. I did a mock installation of the new fork and it seems that this is a perfect match for my frame. No cutting of the steering tube or extending of the threads is needed. I'll be installing the bearing races tonight and starting to look at what all I need to do to the mudguard to make it work with this fork.
In the coming week or two here is what I'll be hoping to get done:
- Install fork and attach the headset.
- Get the stator finished. 12v electronics. No battery, no evil points.
- Prep the engine for final assembly and get it assembled.
- Acquire and install all the rubber moulding bits on the frame.
This should get me close to having a road worthy scooter again.
Saturday, February 19, 2011
More engine work complete
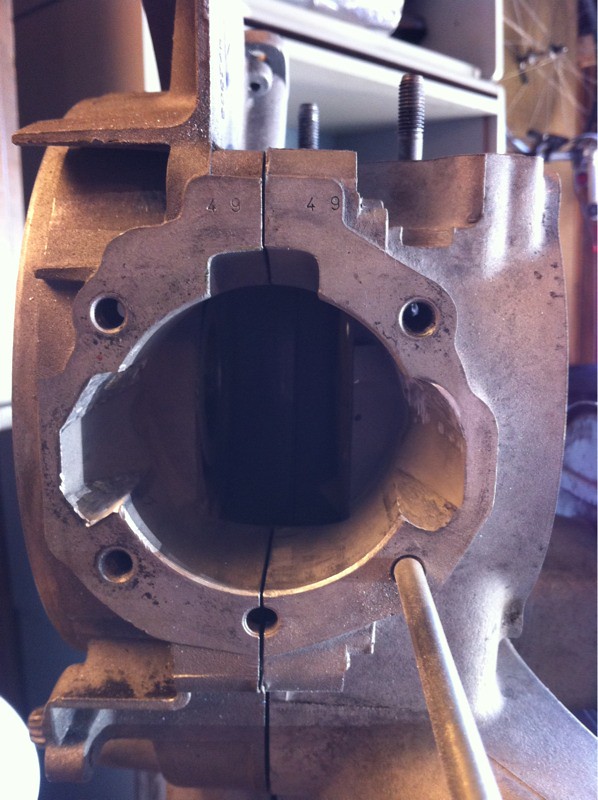
I got a chance this weekend to put in a few hours of work on the engine for my VBB. I had to enlarge the case ports to accommodate the Malossi 166cc cylinder kit that I'll be using. Here are a few pictures I took to document what I did.
Before:
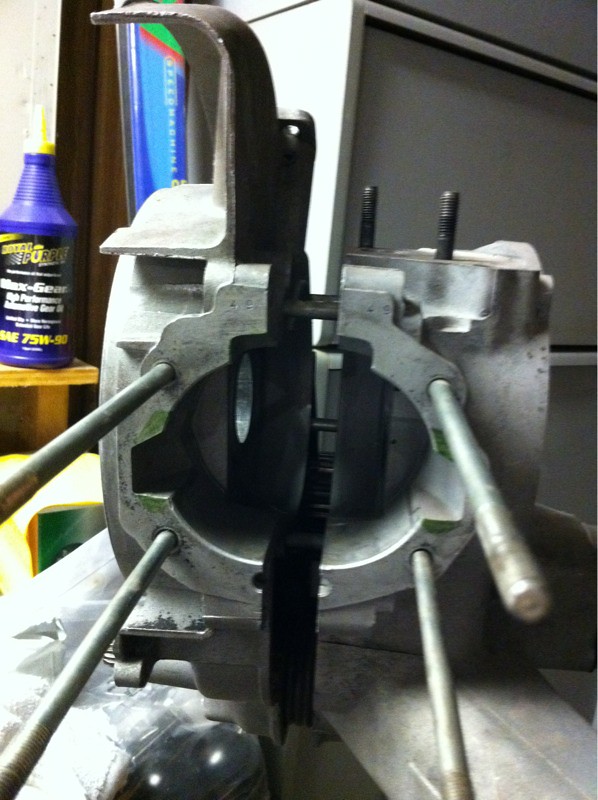
Partial cuts on the flywheel side:


Mostly completed:
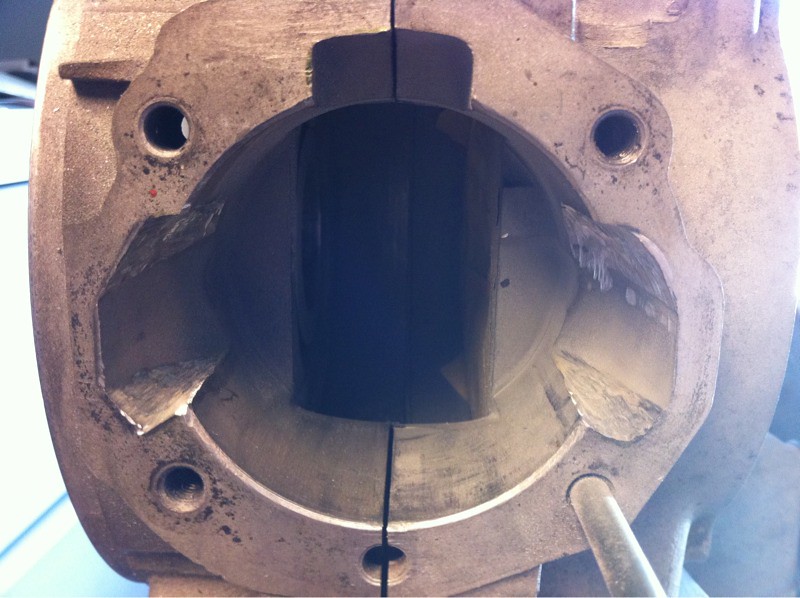
With the Malossi base gasket on:
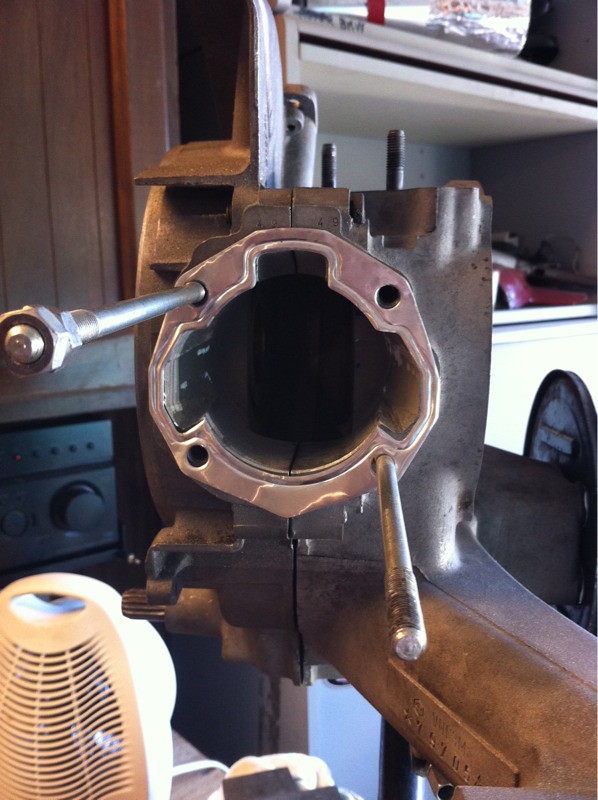
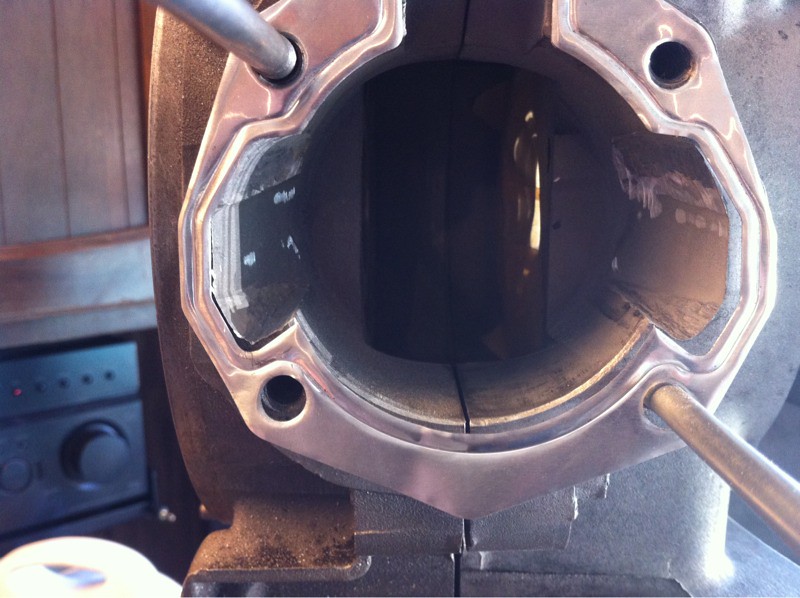
Lots of fun doing all the work on this. I got a new Dremel and the flexible shaft attachment for this project as my old off brand Dremel knock off kinda gave up the ghost. It really made me realize how the right tools really make the job easier.
I'll be taking the engine to my buddy JJ so he can inspect the case porting I've done and make sure it's adequate.
Barring any more need to expand the case ports, final assembly of the engine will be this coming week. After that, work on the frame begins.
- Posted using BlogPress from my iPhone
Before:
Partial cuts on the flywheel side:
Mostly completed:
With the Malossi base gasket on:
Lots of fun doing all the work on this. I got a new Dremel and the flexible shaft attachment for this project as my old off brand Dremel knock off kinda gave up the ghost. It really made me realize how the right tools really make the job easier.
I'll be taking the engine to my buddy JJ so he can inspect the case porting I've done and make sure it's adequate.
Barring any more need to expand the case ports, final assembly of the engine will be this coming week. After that, work on the frame begins.
- Posted using BlogPress from my iPhone
Saturday, February 5, 2011
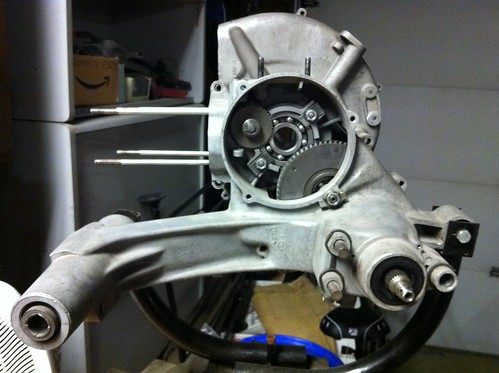
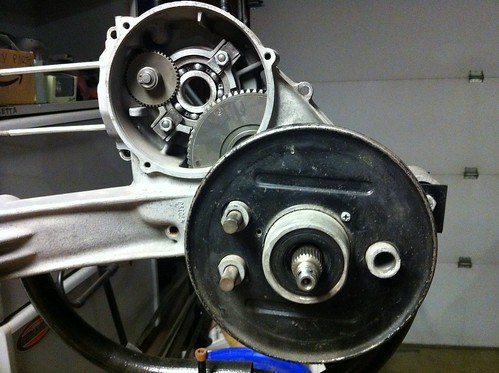
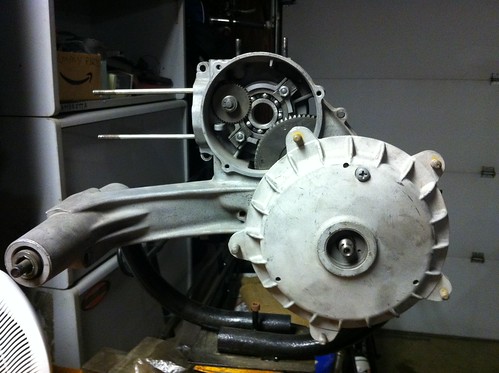
New shots of the engine for the VBB
I'll post descriptions later.
Flywheel side
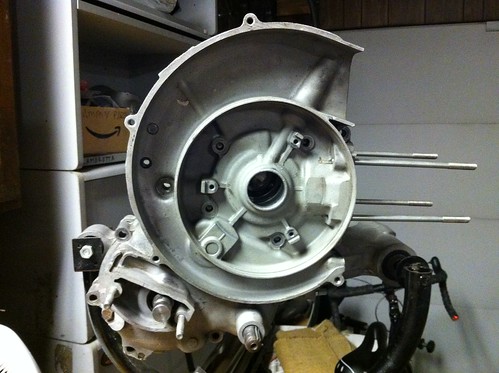
Clutch side
Gear box and clutch side bearings

Flywheel side case half, showing the kickstart gear

Drive side with the 10" backing plate in place
Drive side with the rear hub in place
Friday, January 28, 2011
Garage cabinets project

Here is the progression as I cleaned everything off to get the space ready for the cabinets I obtained from my buddy Pete.


This is the cleanest the workbench has been since I built it.
The next few pictures show the installation of the "new to me" cabinets.


Funny enough, and as is usual with me and projects like this, I ended up having to shift the cabinets 3 inches to the right. My rolling tool box goes in the space just to the left of the workbench and the position of the cabinets wouldn't allow the top of my tool box to open all the way.
I'll have to take and post another picture of the final set up. The workbench has gone back to be a bit messy as I've under taken another project.
Subscribe to:
Posts (Atom)